


Correcting Perspective in Lightroom Classic
Mastering the Guided Upright tool.

Introduction to the Transform Panel in Lightroom
The Transform panel in Adobe Lightroom is a powerful tool for correcting perspective distortions in your photos. It allows you to straighten horizontals and verticals, correct leaning buildings, and overall improve the geometry of your images.
One of the methods available in the Transform panel is the Guided Upright tool. This feature enables you to manually define lines in your photo that should be vertical or horizontal, and Lightroom automatically corrects the perspective based on your guidance.
Step-by-Step Guide to Using the Guided Upright Tool:
Step 1: Open Your Image in Lightroom
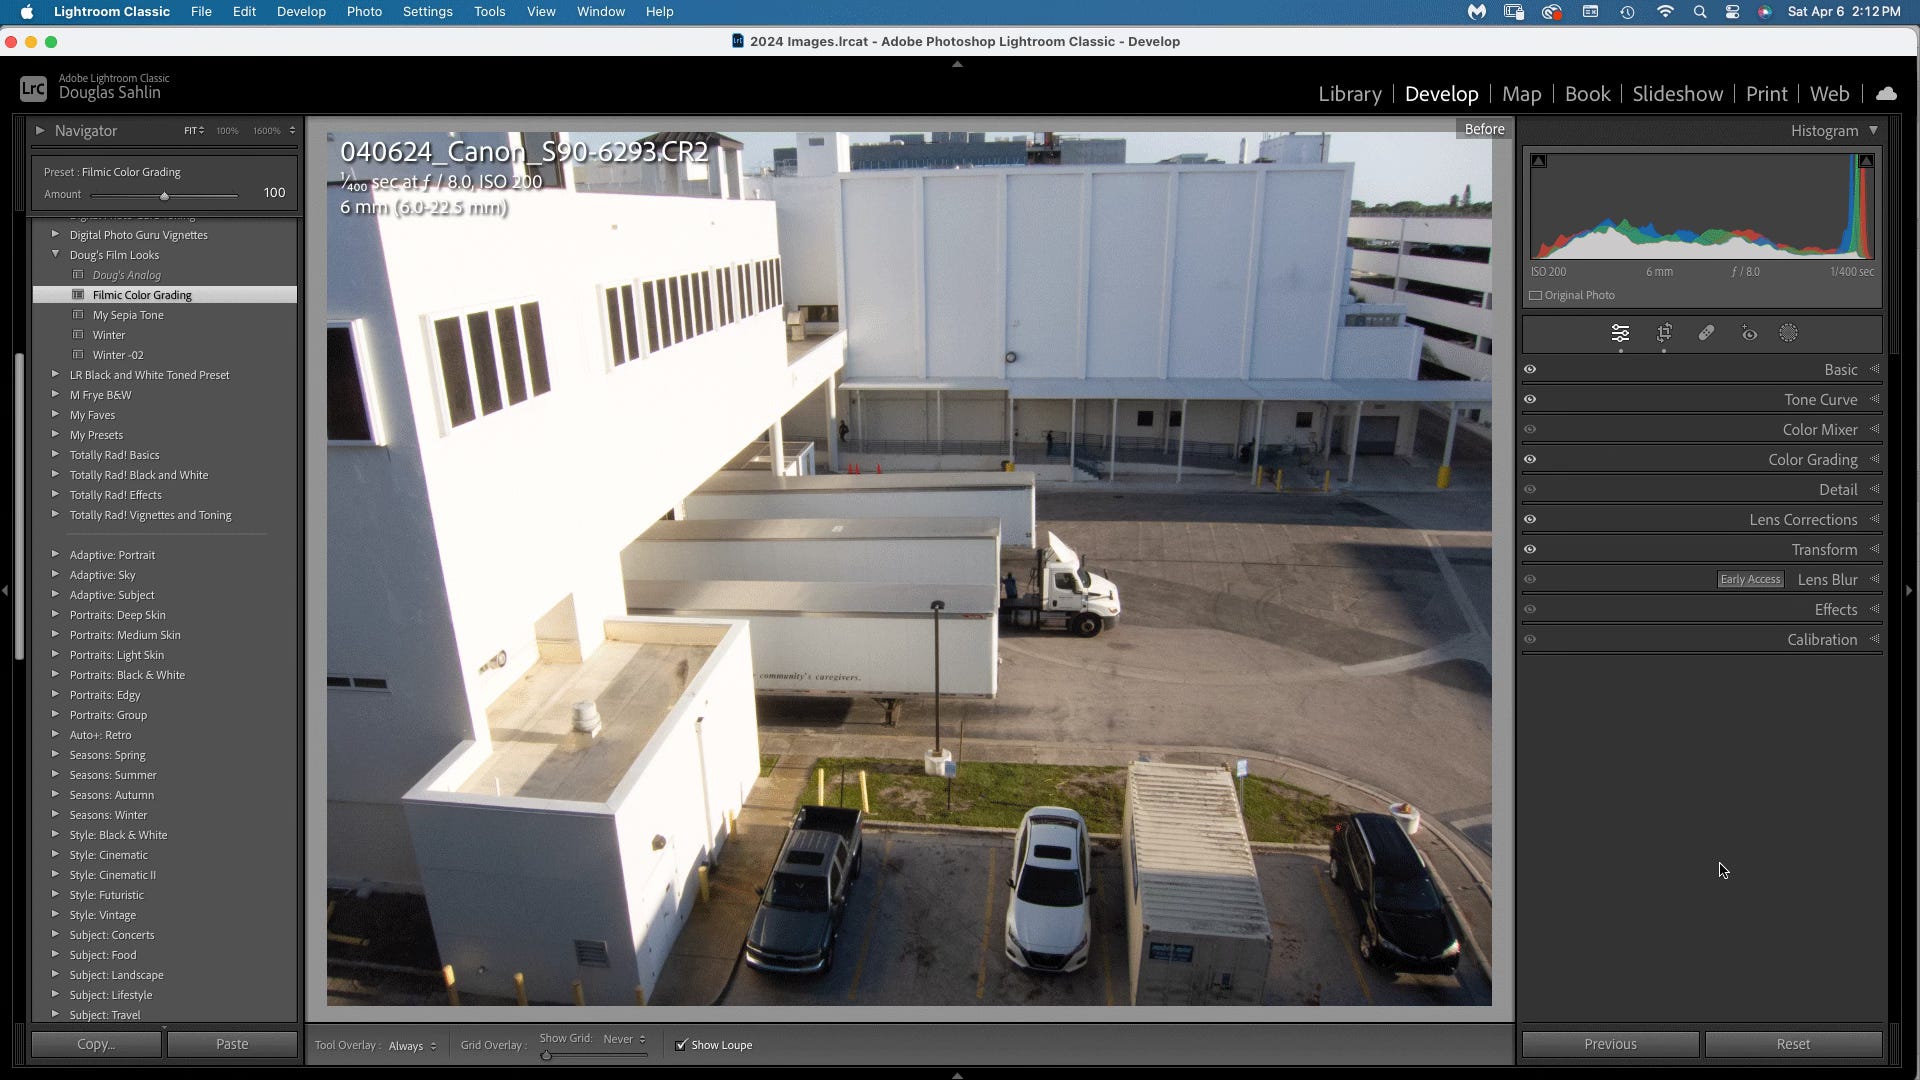
Launch Adobe Lightroom and import the image you want to correct perspective on. Perform basic edits on your image such as exposure, contrast, and color. Use the various tools and panels in Lightroom to make these tweaks. The following image has severe perspective issues because I pointed the camera down when I captured the image. I’m going to correct that in the Transform panel.
Step 2: Access the Transform Panel
Navigate to the Develop module by clicking on "Develop" at the top right corner of the screen. Then, locate the Transform panel. It's typically situated on the right side of the interface.
Step 3: Select the Guided Upright Tool
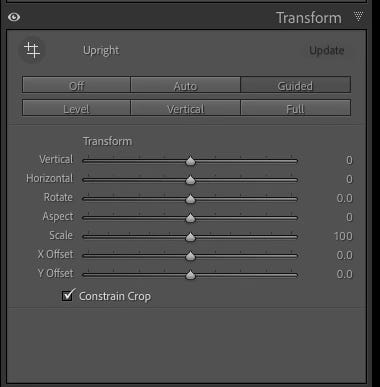
Within the Transform panel, you'll see several options such as Auto, Level, Vertical, and Full. Choose the Guided Upright tool by clicking on the icon that resembles a square with two lines inside.
Step 4: Define Vertical and Horizontal Lines
Click on the image where you want to define a vertical or horizontal line. Typically, you'll want to click on features that should be perfectly vertical or horizontal in the corrected image. For example, the corner of a building for vertical lines or the horizon for horizontal lines. When you create the line, Lightroom creates a square that enables you to precisely define the line.
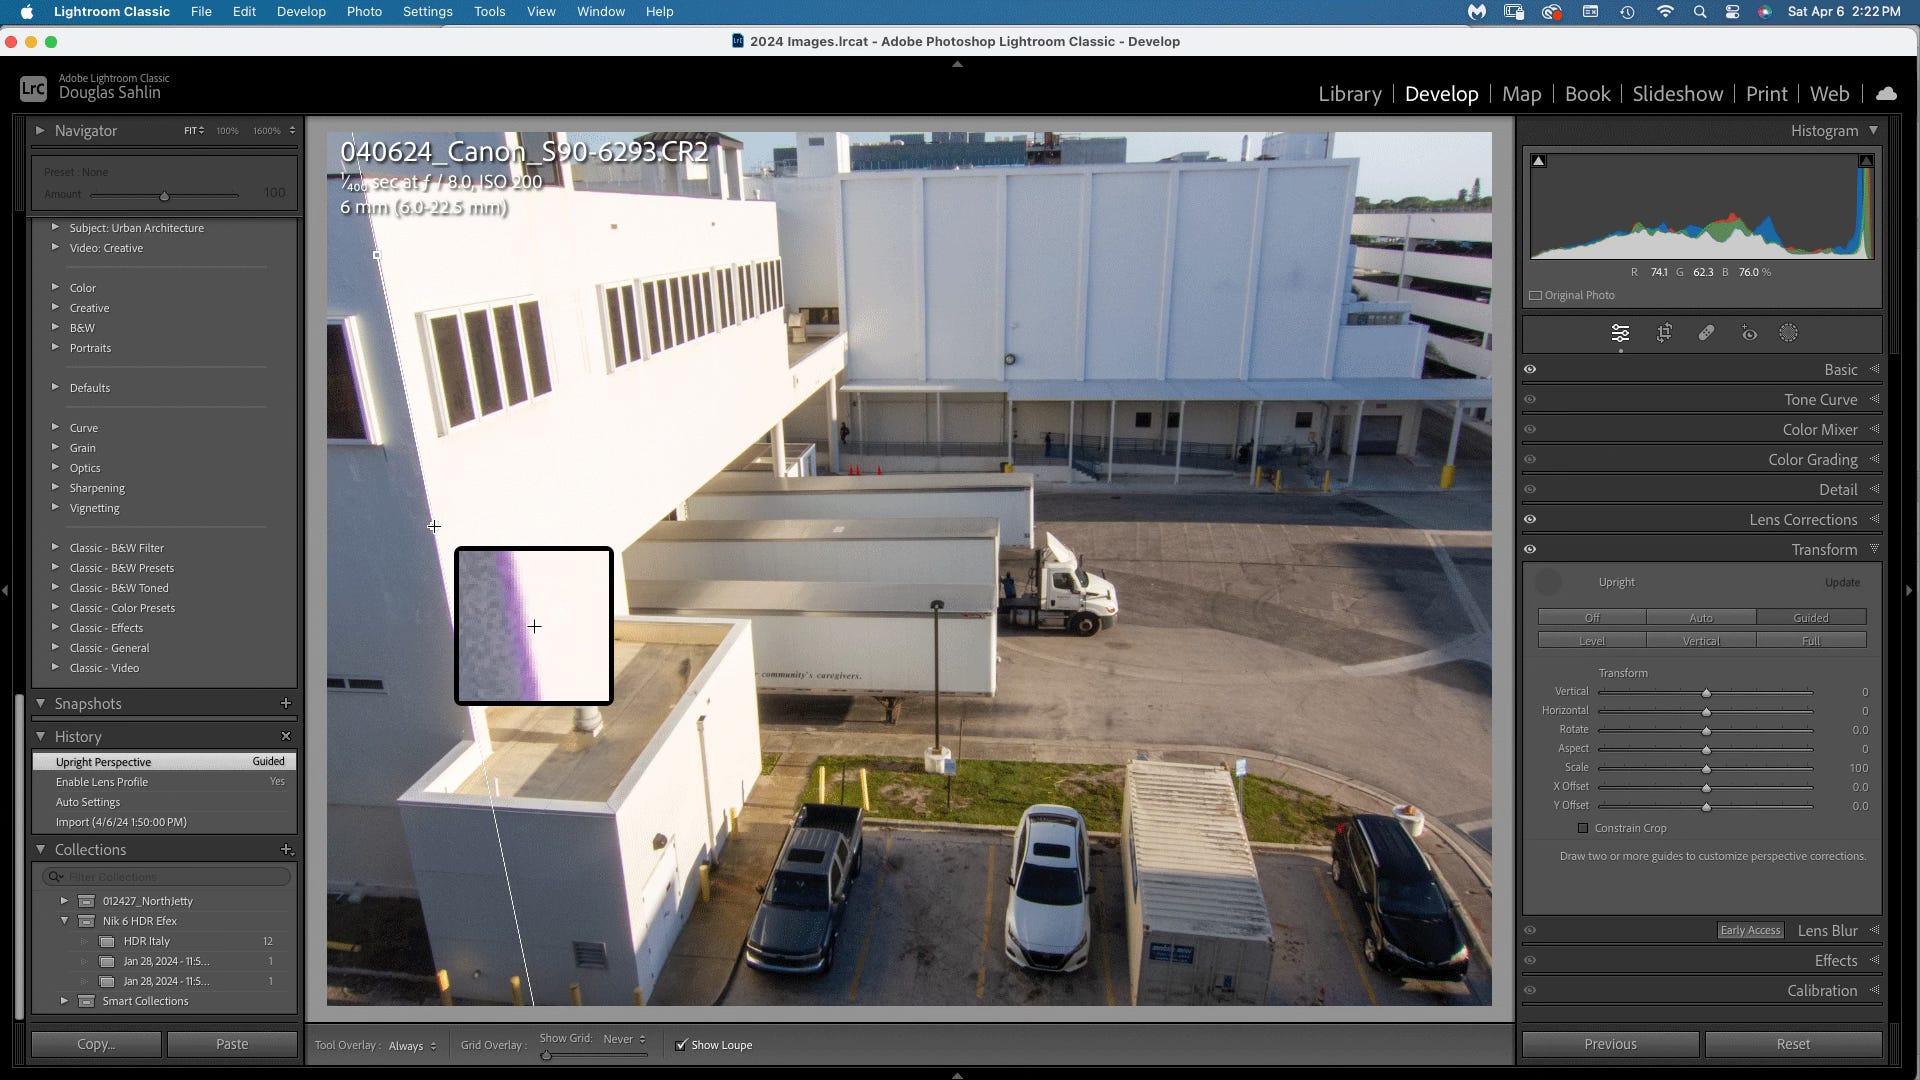
Click and drag to draw a line along the feature you've selected. Lightroom will automatically adjust the perspective based on the line you've drawn.
Step 5: Add Additional Lines (Optional)
Depending on the complexity of your image, you may need to add additional guided lines to improve the correction. Repeat the process by clicking on other features that should be vertical or horizontal and drawing lines along them.
Step 6: Fine-Tune the Corrections (Optional)
After adding your guided lines, Lightroom will make automatic adjustments to correct the perspective. If needed, you can further fine-tune the correction using the sliders in the Transform panel. You can also change the vertical and horizontal lines by changing the position of the starting and ending points of the line. You can also click a line and delete it to create another line on a different part of the image. You can also adjust sliders such as Vertical, Horizontal, Rotate, and Scale to refine the correction to your liking. After repairing the perspective, you may notice white areas outside the image. To fix that problem, click Constrain Crop.
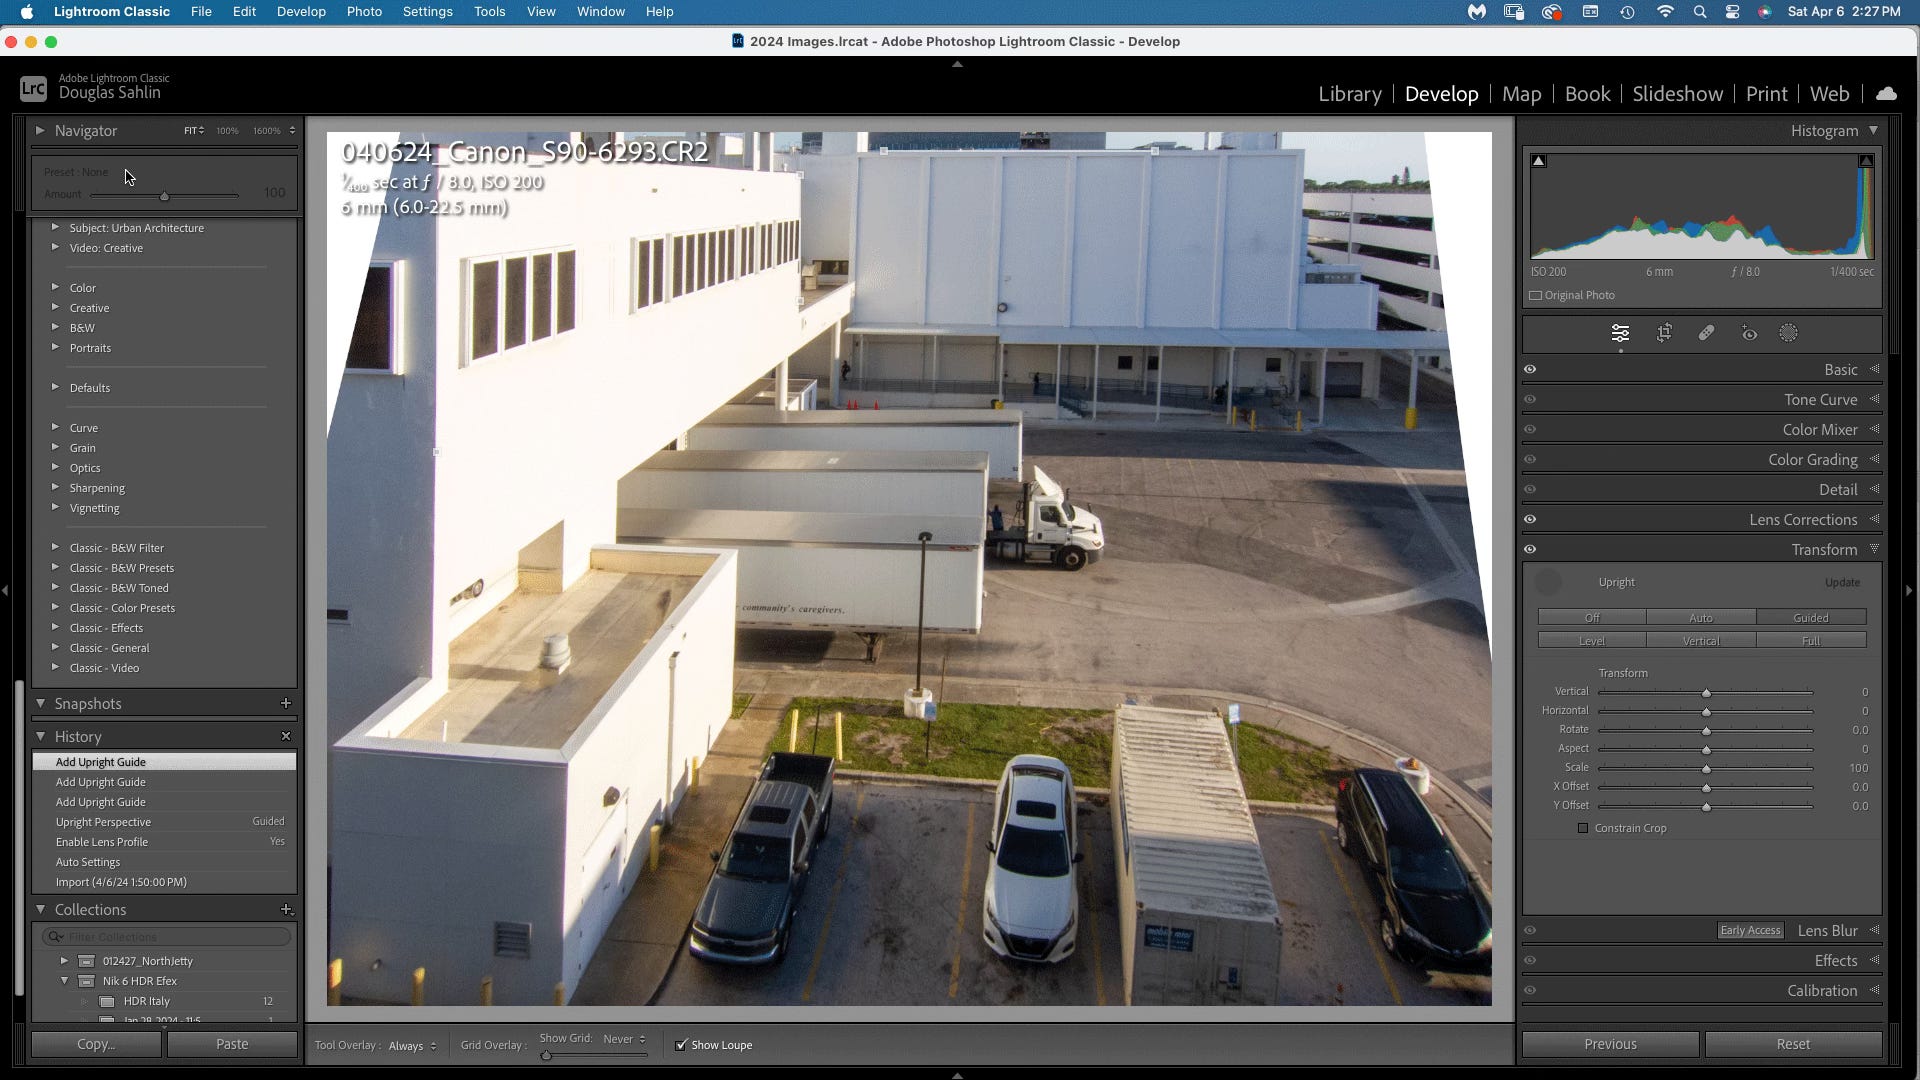
The following shows the image after using the Guided Upright Tool.

Congratulations! You've successfully corrected perspective and fixed verticals and horizontals using the Guided Upright tool in Lightroom's Transform panel. Experiment with this feature on different images to perfect your editing skills.